
Invite Your Team
On this page
This guide explains how to onboard your team to the Grower Platform by setting up departments and roles for proper organization. It covers creating departments, defining roles with specific permissions, and adding users with key details like name, email, and department. You’ll also learn how to send invitation emails for account setup and manage user access seamlessly.
Grower makes it simple to invite your team members to join your organization and collaborate effectively. Before inviting anyone, it’s important to set up the departments and roles within your organization. This ensures that every team member is assigned the right responsibilities and permissions, aligning perfectly with your organization's structure. It all starts in Mission Control, the central hub for managing your organization.
To access Mission Control, click on the "Mission Control" tab in the main navigation bar on the left-hand side of your screen. Once there, select the "User Management" tab to access options for managing departments, roles, and users. From this section, you can efficiently structure your organization and onboard your team with ease.
Step 1 - Creating A Department
Departments in Grower allow you to group users based on functional areas or teams within your organization. This helps streamline management and ensures that each team member aligns with their respective group.
To create a department, navigate to Mission Control, select the "User Management" tab in the side menu, and click on the "Departments" option.
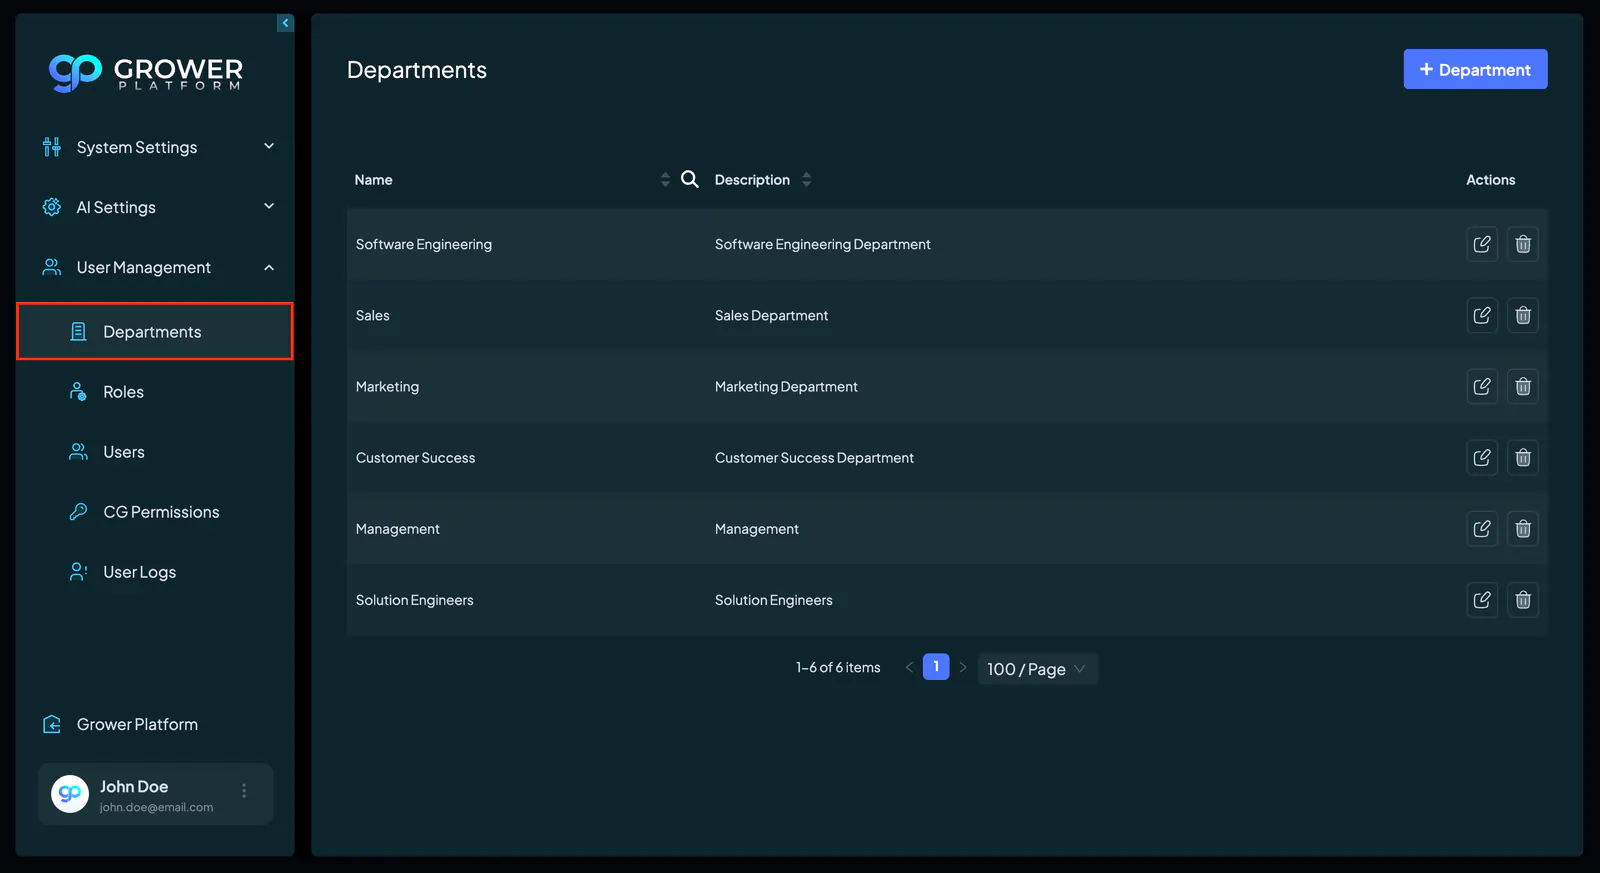
Once on the Departments page, click the "+ Department" button in the top-right corner. A popup will appear, prompting you to enter the department name and provide a description outlining its purpose.
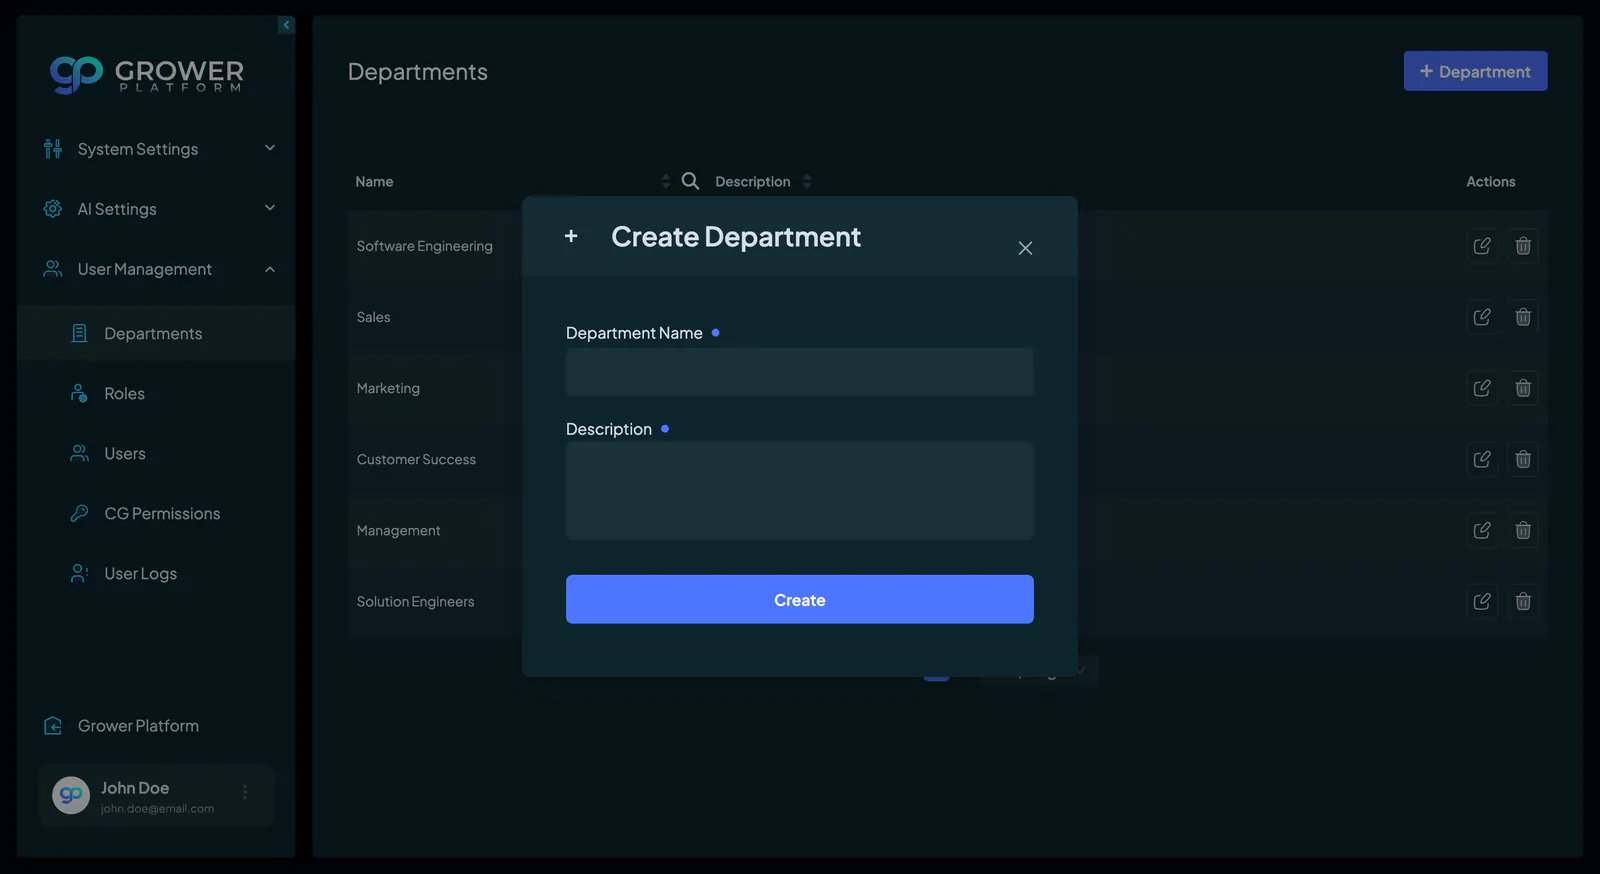
Once you’ve entered the required details, click the "Create" button to finalize the process. The new department will now appear in the list of departments, where you can edit or delete it as needed.
For more information about departments, check out our Departments Guide.
Step 2 - Creating A Role
A Role defines a user's position within your organization and determines their access to specific features and capabilities within Grower. Each role is assigned a specific set of permissions that govern what actions a user can perform, ensuring that access aligns with their responsibilities. Since permissions are role-based, any updates to a role will automatically apply to all users assigned to it.
To create a role, navigate to Mission Control, select the "User Management" tab in the side menu, and click on the "Roles" option.
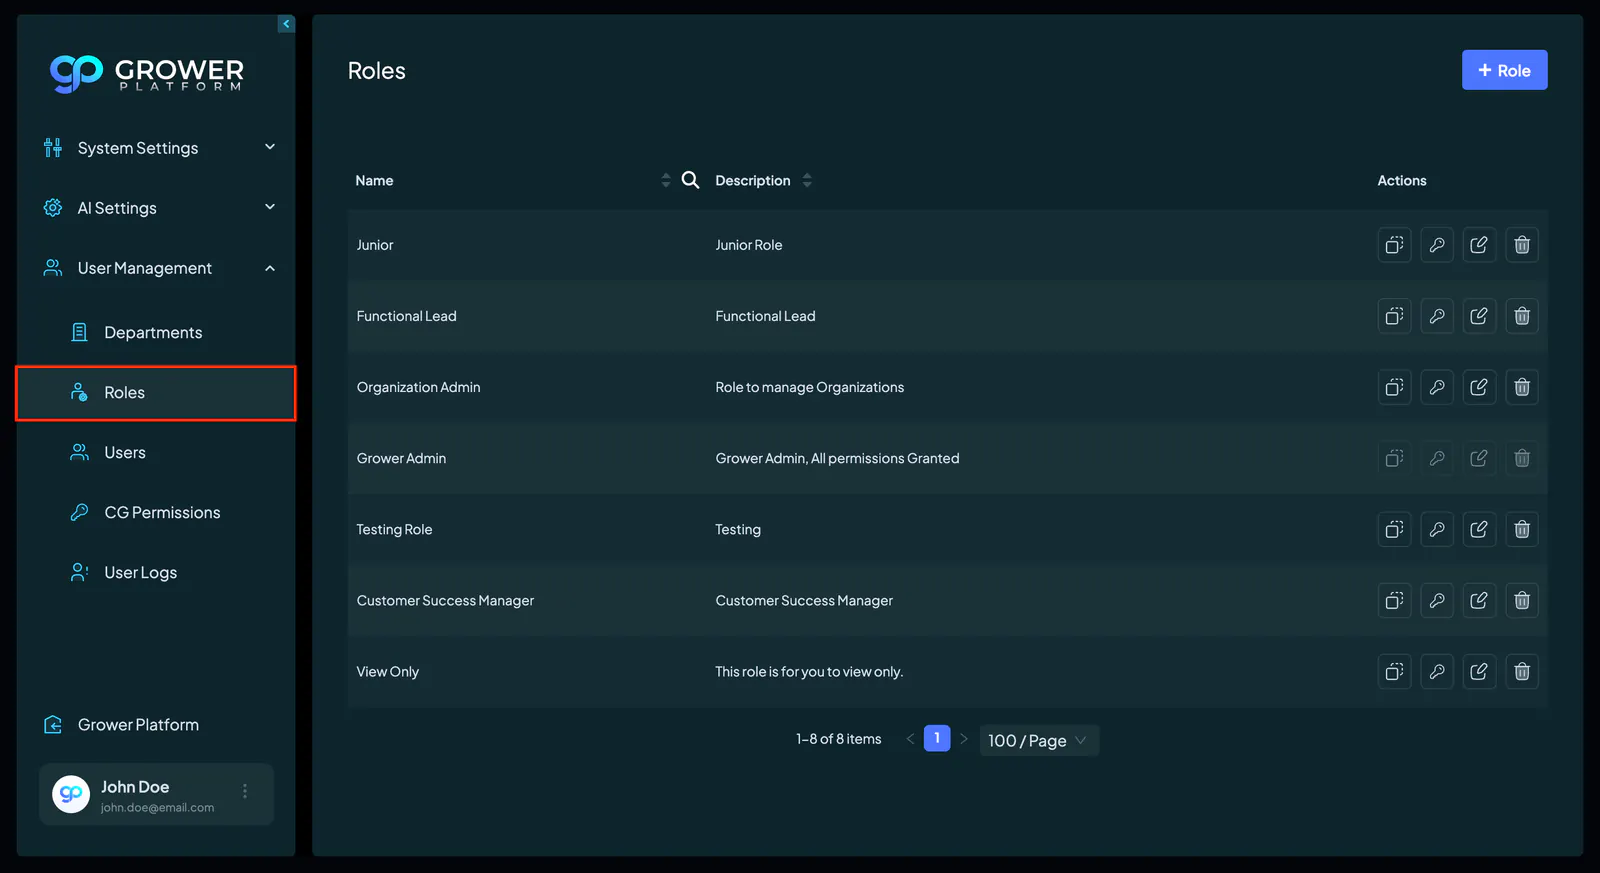
Once on the Roles page, click the "+ Role" button in the top-right corner. A popup will appear, prompting you to enter a unique name for the role along with a description of its responsibilities.
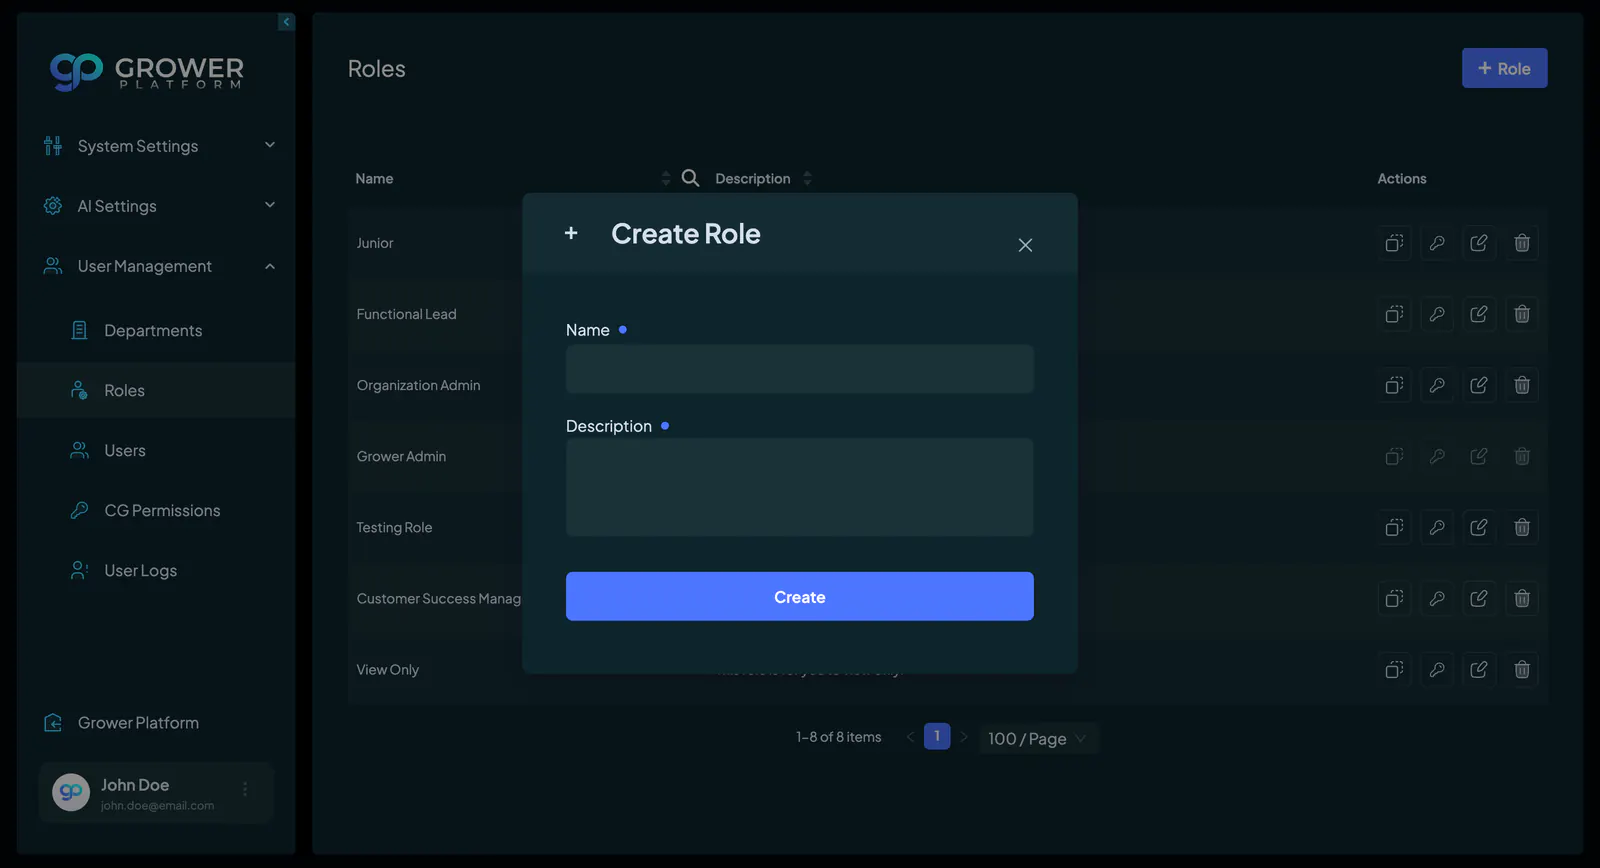
After saving the role, you’ll have the ability to assign specific permissions that define what users with this role can access and do within Grower. By default, a newly created role will have no permissions assigned, allowing you to tailor it precisely to your organization’s requirements.
To learn more about roles and permissions, visit our Roles Guide.
Step 3 - Creating A User
Before adding a user, make sure you’ve already created the necessary department and role. This ensures everything is properly organized when assigning users to their teams.
To create a user, navigate to Mission Control, select the "User Management" tab in the side menu, and click on the "Users" option.
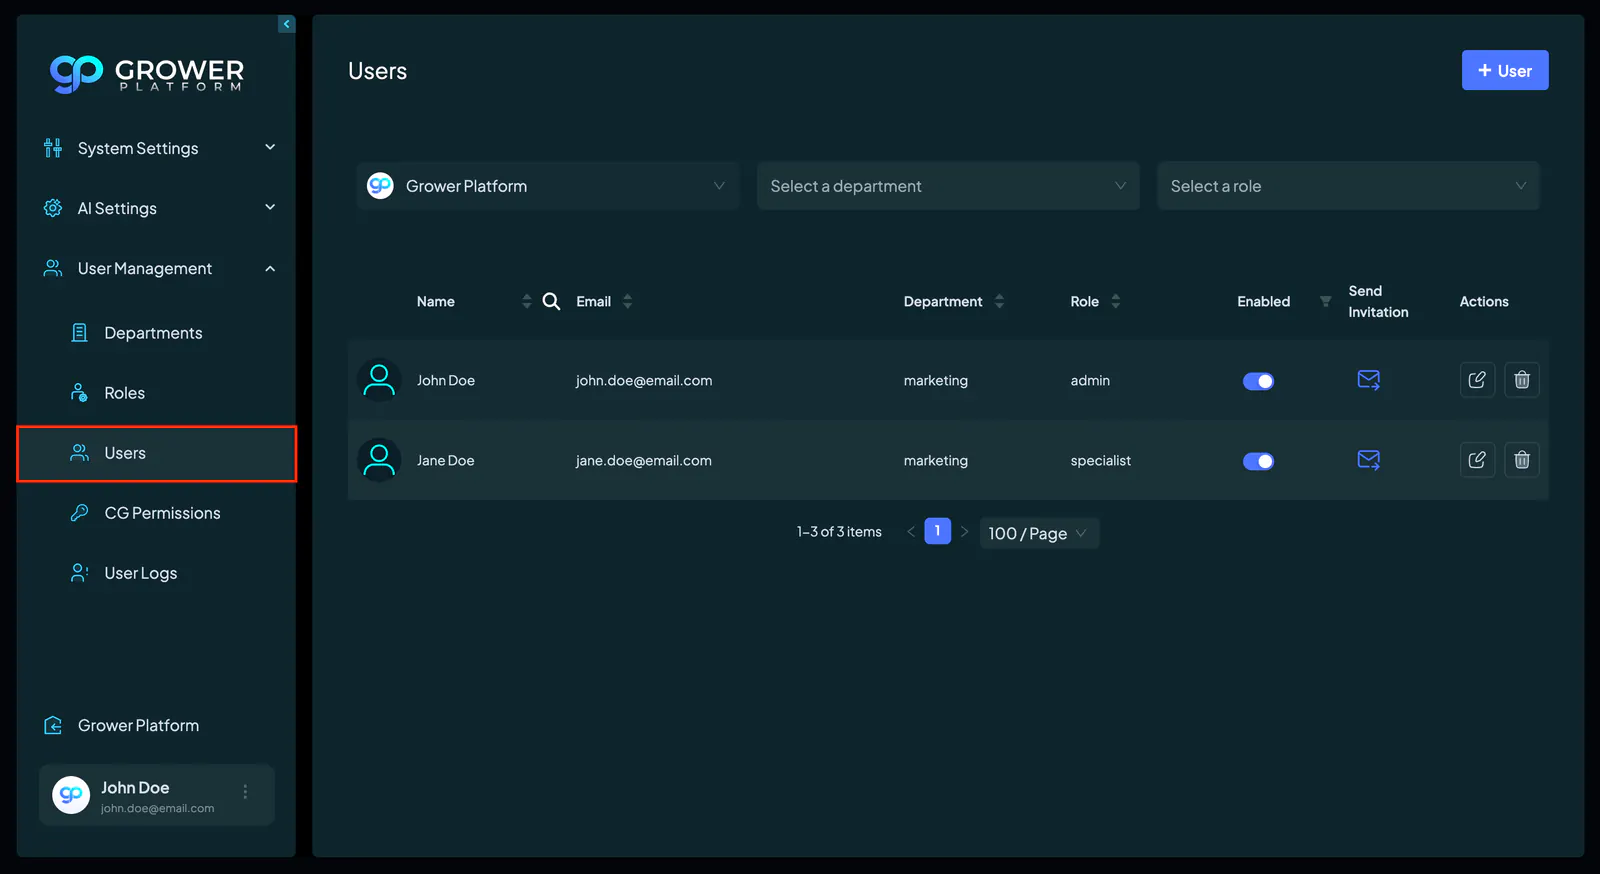
To create a User simply click the "+ User" button. You will first be promoted to fill in the user's first and last name, as well as their email address.
On the Users page, click the "+ User" button in the top-right corner. In the first slide of the popup, you’ll be prompted to fill in the user’s first name, last name, and email address.
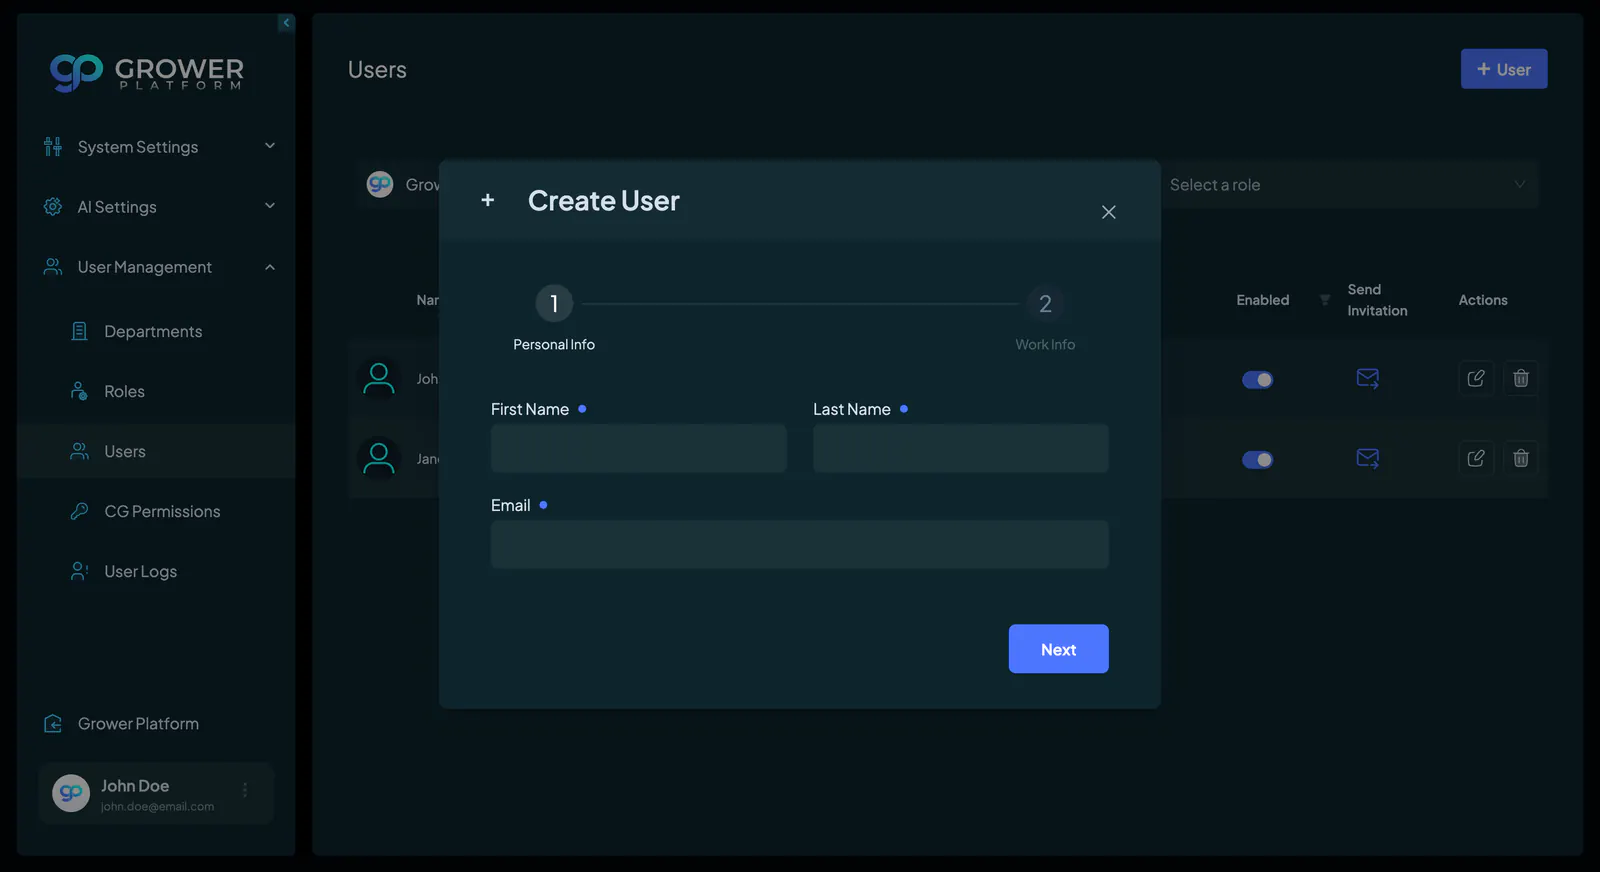
After clicking "Next," the second slide will allow you to select their organization (if you’re an admin), department, and role.
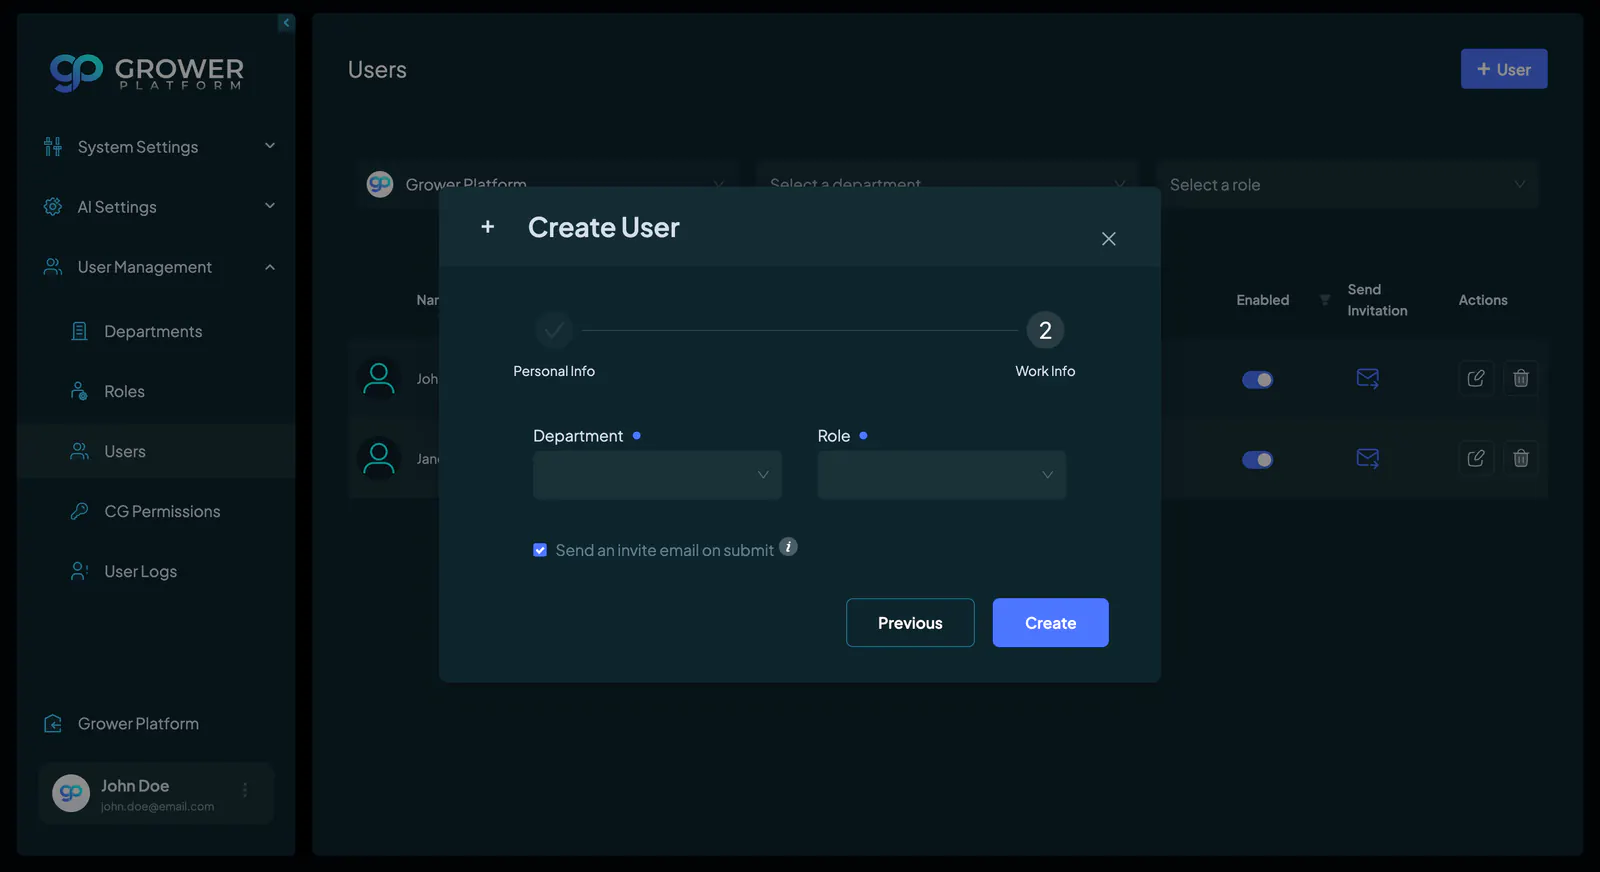
You can also decide whether to send an invitation email immediately. If you prefer not to send it right away, untick the "Send an invite email on submit" checkbox. This gives you more control over the onboarding process.
For more information about users, refer to our Users Guide.
Step 4 - Inviting A User
If a user already exists in your organization, you can send them an invitation email to join the platform. To do this, navigate to Mission Control, select the "User Management" tab in the side menu, and click on the "Users" option.
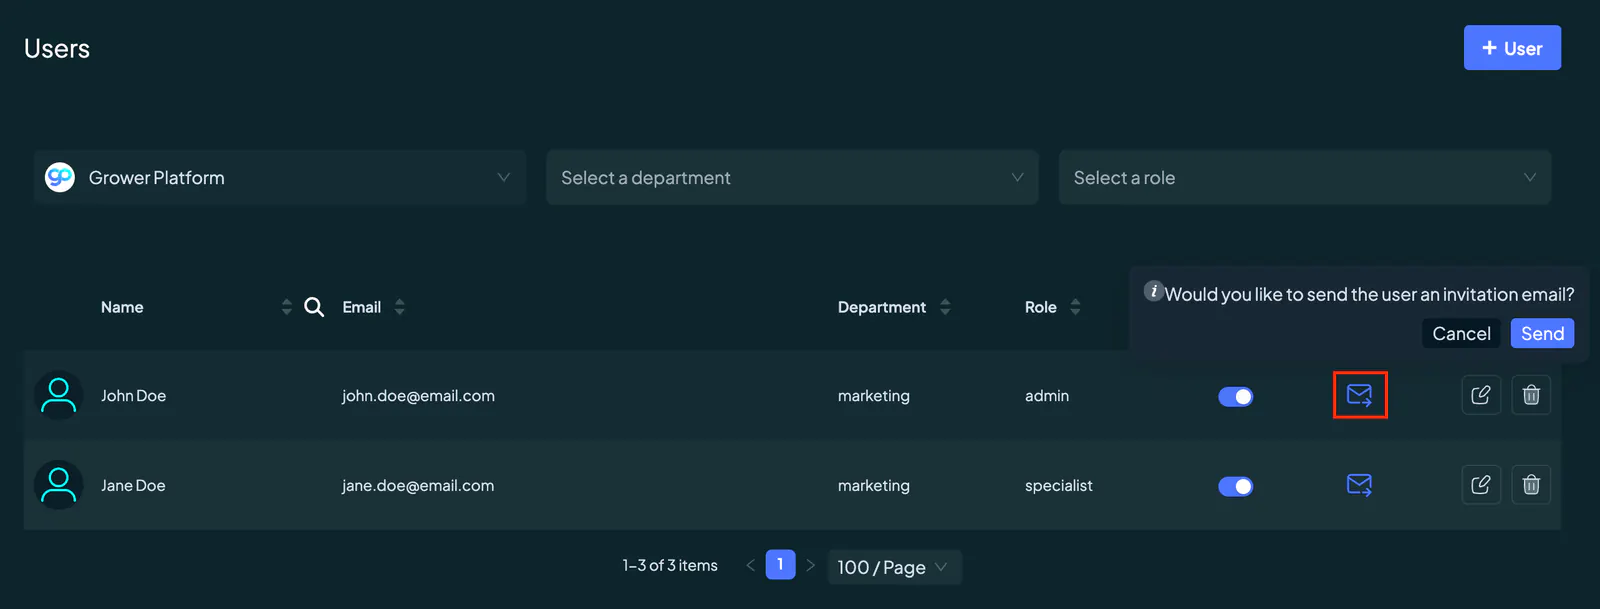
On the Users page, locate the user you wish to invite from the list and click the email icon next to the "Actions" column. A prompt will appear asking, "Would you like to send the user an invitation email?"
A prompt will appear asking, "Would you like to send the user an invitation email?" Click the "Send" button to confirm, and the system will dispatch an email to the user, inviting them to join the platform. If you change your mind, simply select "Cancel."
The user will then receive an email prompting them to confirm their organization by clicking the "Verify Account" button. Once they’ve verified their account, they will be directed to a secure page where they can set their password. After completing this step, the user will be ready to access Grower!
If at any point a user needs assistance with this process, you can direct them to our Create Your Account Guide for additional support.